")
Integration of Entra ID with One Login as TIDPs (Trusted Identity Provider)
Priyanshu JethanandaniAugust 20, 2025
Share this article
")
")
")
")
This document is for the refers to integrate the Microsoft Entra as the TIDPs for the One Login users to access the One Login Application with the credentials of there Entra ID.
Log in to the OneLogin Administration Portal to begin integrating with Entra ID.
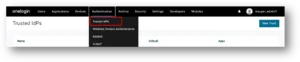
We need to create the TIDP in our OneLogin portal by navigating to Authentication → Trusted IdPs.
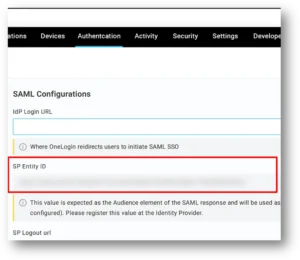
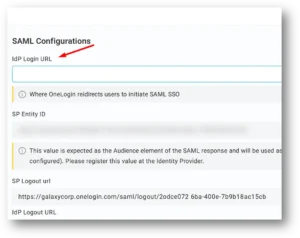
When creating a new Trust in Trusted IdPs, you will find the SP Entity ID under the SAML Configurations section. Make sure to store this value, as it will be needed later.
Now we need to log in to the Microsoft Entra portal. Use an account that has the Application Administrator role, as only users with this role can create and manage a SAML application in Entra.
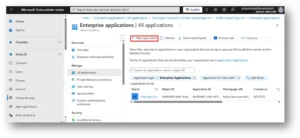
Under the Entra ID section, go to Enterprise applications. To create a non-gallery SAML SSO (Single Sign-On) application, click on New application (as shown in the image).
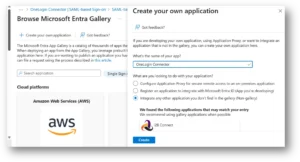
Inside the New Application window, click on Create your own application. You will be prompted to enter a name for your application and choose an option. Select Integrate any other application you don’t find in the gallery (Non-gallery) and click on Create.
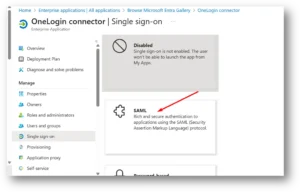
You will be redirected to the overview page of the application you just created. Under the Manage section, click on Single sign-on. Choose the SAML option.
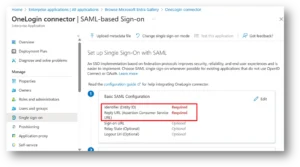
When you enter the SAML configuration page, set the following: – Identifier (Entity ID): Paste the value you previously copied from OneLogin during the creation of the Trusted IdP. – Reply URL: Enter the following URL: `https://subdomain.onelogin.com/access/idp`
Replace subdomain with the domain name of your OneLogin instance.
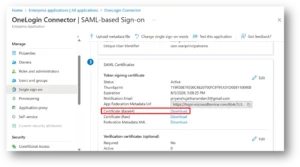
After entering the details, go to the SAML Certificates section. Download the certificate in Base64 format.
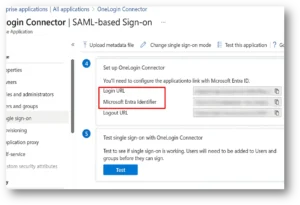
Scroll down to the Set up OneLogin Connector section. Here, you will find: – The Login URL – The Microsoft Entra Identifier Make sure to note them down for later use.
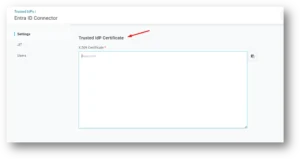
Return to the OneLogin Trusted IdPs portal. Paste the certificate (Base64 format) you downloaded from the Microsoft Entra portal into the certificate field.
In OneLogin’s SAML Configuration section, paste the Login URL copied from Microsoft Entra.
In the Configurations section, paste the Microsoft Entra Identifier into the Issuer field. Check the box Sign users into OneLogin and leave other options unchecked.

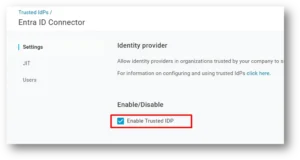
Enable the Trusted IdP option to allow OneLogin to use Microsoft Entra for authentication.
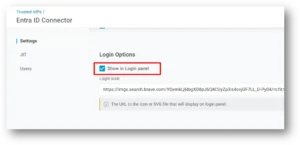
As the final step, go to the Login options and check Show in login panel. This will allow users to log in with Microsoft Entra on the OneLogin sign-in page.
") Priyanshu Jethanandani
Priyanshu Jethanandani
Priyanshu Jethanandani is a Software Engineer at NextGenSoft, specializing in designing and developing scalable, high-performance software solutions. He is passionate about modern application development, cloud technologies, and AI-driven innovation, with a focus on building reliable and efficient digital products that solve real-world business challenges.
We’re ISO/IEC 27001:2022 certified, ensuring your projects are executed with globally recognized security standards.
INDIA